If you have ever hopped on the leg press machine and just placed your feet wherever felt comfortable, you are not alone. Most people do exactly that. But here is the thing: small, intentional shifts in proper leg press foot placement can completely change which muscles are doing the work. That means the difference between building powerful quads, developing rounder glutes, or strengthening your hamstrings could literally come down to a few inches on the footplate. The leg press is one of the most versatile machines in the gym, and once you understand how foot positioning affects your muscles, every session becomes a lot more productive.
Think of this as your practical leg press foot placement guide: it walks you through the most effective positions, explains what each one targets, and gives you the knowledge to build a lower body that is strong, balanced, and well-developed. Whether you are a beginner or someone who has been training for years, there is something here worth applying to your next leg day.
Quick Reference: Best Foot Placement by Goal
| Goal | Foot Width | Platform Height | Toe Angle |
| Quad Size & Strength | Narrow (6–10 inches) | Lower 25–30% | 0–15° |
| Glute Development | Wide (1.5–2x shoulder) | Upper 70–80% | 30–45° |
| Hamstring Focus | Wide (1.5–2x shoulder) | Upper 70–80% | 30–45° |
| Balanced Development | Shoulder-width | Center (50%) | 15–20° |
| Calf Activation | Balls of feet only | Bottom 10–15% | 0° |
| Fix Imbalances | Single leg, centered | Center (50%) | 10–20° |
| Rehab / Knee Issues | Shoulder-width | Upper 60–70% | 15–20° |
Why Foot Placement Actually Matters
The leg press platform is large for a reason. It gives you room to experiment, and that freedom is a genuine advantage if you use it wisely. When you shift your feet higher, lower, wider, or narrower, you are changing the joint angles at both your knees and hips. Those angle changes directly affect which muscle groups bear the most load during each repetition.
Think of it like adjusting the angle of a spotlight. The light source does not change, but what gets illuminated does. Whether you are working with a seated leg press foot placement on a standard pin-loaded machine or a plate-loaded sled, the same principle applies: the same weight and the same effort can produce very different muscle stimulation depending on where your feet land on the plate.
Beyond muscle targeting, foot placement also affects your joint safety and range of motion. A position that feels strained is usually a sign it is not right for your body mechanics, so always prioritize control over chasing heavier weight.
Types of Leg Press Machines
Foot placement principles apply across all leg press machine types, but it helps to know the differences:
Horizontal Seated Leg Press: You sit upright and push the platform directly forward. These are usually pin-loaded and considered the safest option for beginners because of their stable, controlled range of motion.
45-Degree Incline Leg Press: The most common machine in commercial gyms. The seat reclines at an angle while your legs press upward diagonally. The angled position naturally increases glute and hamstring involvement and allows heavier loading.
Plate-Loaded Sled: Similar to the incline machine but uses weight plates instead of a pin stack. It accommodates much heavier loads and is favored by experienced lifters chasing maximum strength.
Iso-Lateral Leg Press: Each leg works independently on its own platform, making it ideal for identifying and correcting strength imbalances between sides.
Regardless of the machine type you use, the foot placement principles covered below apply equally to all of them.
Muscles Worked by the Leg Press
Every foot placement variation still engages the full lower body to some degree. What changes is the emphasis placed on each muscle group:
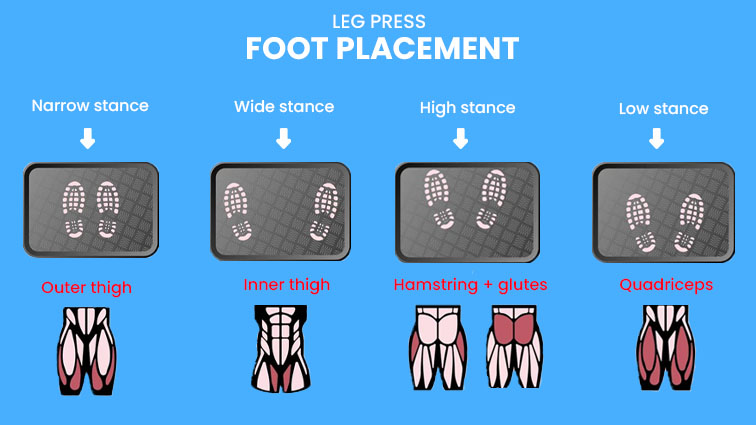
Quadriceps (front of the thighs) — the primary mover in every leg press variation. The degree of involvement goes up with lower and narrower foot placements.
Hamstrings (back of the thighs) — more active with high and wide foot placements that increase hip range of motion.
Glutes (gluteus maximus) — heavily recruited when feet are placed high and wide, which deepens hip flexion and extension with every rep.
Calves (gastrocnemius and soleus) — lightly involved in all variations, more active in low placements, and the primary target in the toes-only calf raise variation.
Adductors (inner thighs) — recruited more significantly in wide stance variations.
Vastus Lateralis (outer quad) — emphasized more during narrow stance pressing.
The Main Foot Placement Positions and What They Do
1. Standard Placement: Your Foundation
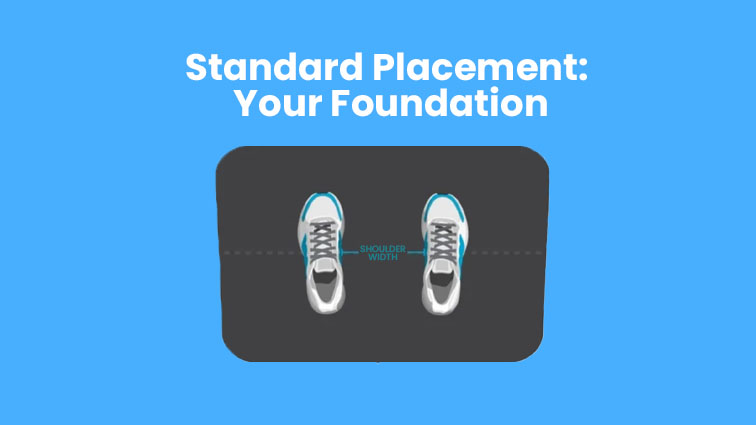
Foot width: Shoulder-width (12–16 inches apart)
Platform height: Center of the footplate
Toe angle: 15–20° outward
Muscle activation: Quads 40%, Glutes 30%, Hamstrings 30%
The standard position means placing your feet about shoulder-width apart in the center of the footplate, with your toes pointing slightly outward at around 15 to 20 degrees. This mild angled leg press foot placement is where most people start, and for good reason. It creates a balanced stimulus across the quads, hamstrings, glutes, and calves without dramatically overloading any single group.
If you are new to the leg press, this is the position to master first. Focus on driving through your entire foot evenly, keeping your lower back pressed against the seat, and lowering the platform until your knees reach roughly a 90-degree angle. Once you are confident here, experimenting with other variations becomes much more productive because you have a solid baseline to compare against.
2. High Foot Placement: Targeting the Glutes and Hamstrings
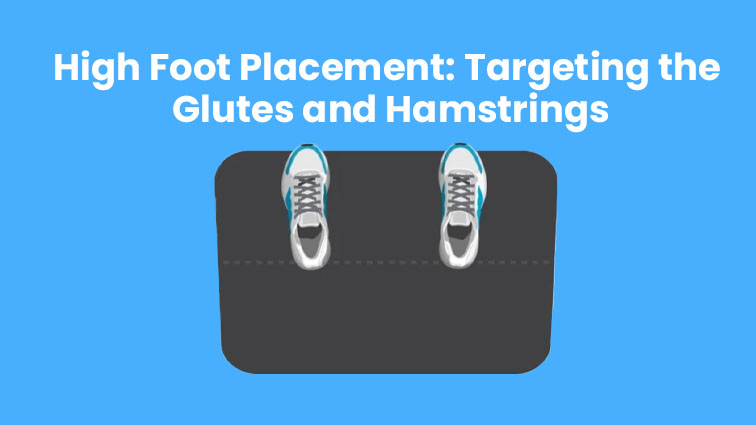
Foot width: Shoulder-width or wider
Platform height: Upper 70–80% of footplate
Toe angle: 15–30° outward
Muscle activation: Glutes 45%, Hamstrings 35%, Quads 20%
When you move your feet toward the upper portion of the footplate, your hips go through a greater range of motion during each rep. This is especially noticeable on an incline leg press foot placement, where the 45-degree angle of the machine already deepens hip involvement, and raising the feet amplifies that effect further. The increased hip movement shifts a significant portion of the work away from your quads and onto your glutes and hamstrings.
This placement pairs well with a wider stance if you really want to zero in on the glutes and hamstrings together. Push through your heels rather than the balls of your feet to feel the posterior chain engage more strongly. Many people who struggle to feel their glutes working during leg exercises find the high foot position to be a genuine game-changer.
3. Low Foot Placement: Building Quad Size and Strength
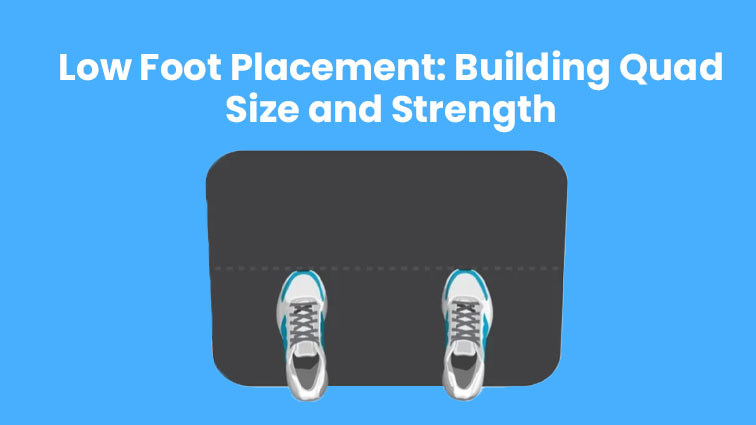
Foot width: Shoulder-width or slightly narrower
Platform height: Lower 25–30% of footplate
Toe angle: 15–20° outward
Muscle activation: Quads 70%, Glutes 20%, Hamstrings 10%
Dropping your feet toward the bottom of the footplate increases the range of motion at your knees and requires deeper knee flexion with every rep. That deeper bend creates a stronger stretch through the quadriceps, which is a key driver of muscle growth. Your quads have to work significantly harder to push the weight back up from that deeper position, making this one of the most effective variations for building quad size.
A word of caution: this placement puts more stress on the knees. If you have any existing knee issues, approach it carefully and start light. Good ankle mobility also helps here, because without it your heels may lift off the plate, which reduces your stability and force output. If that happens, work on ankle mobility as a separate goal rather than forcing your way through the movement.
4. Wide Stance: Inner Thighs, Glutes, and More
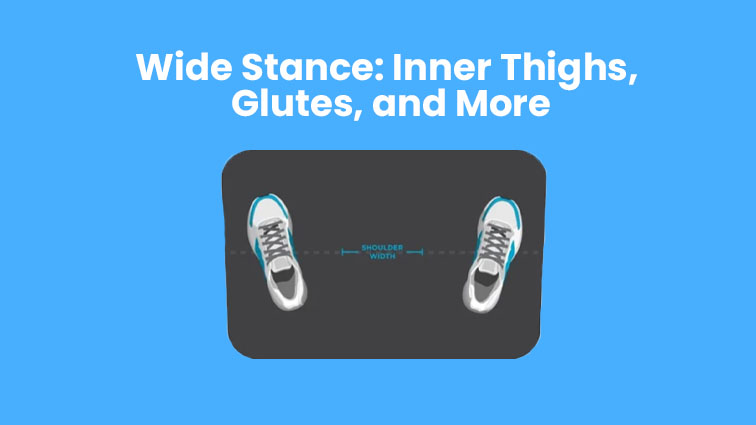
Foot width: 1.5–2x shoulder-width (20–28 inches apart)
Platform height: Center of footplate
Toe angle: 30–45° outward
Muscle activation: Inner Quads/Adductors 45%, Glutes 35%, Hamstrings 20%
A wide stance, with your feet placed roughly 1.5 to 2 times shoulder-width apart and toes angled outward to match, is widely considered the most effective leg press foot placement for glutes because it increases both hip range of motion and adductor involvement with every rep.
One practical benefit of the wide stance is that many people find they can handle heavier loads compared to the narrow position, simply because the movement mechanics suit a broader base. Over time, this placement can also contribute to improved hip mobility, which carries over into other exercises like squats and lunges. Make sure your knees track over your toes and do not cave inward, as this is a common form breakdown with wider stances.
5. Narrow Stance: Quad Isolation and Definition
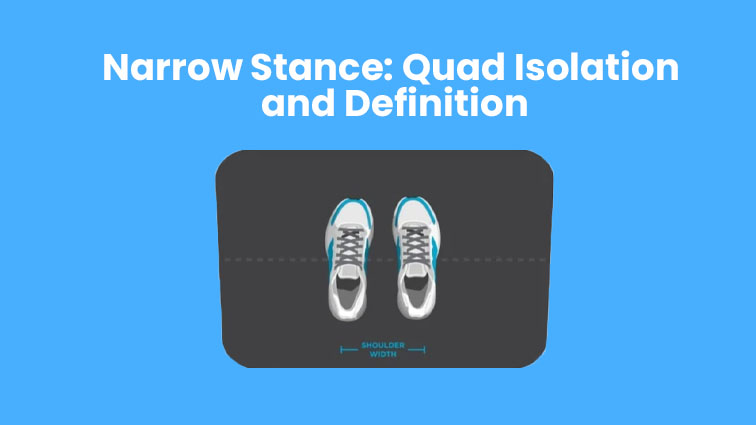
Foot width: Hip-width or less (6–10 inches apart)
Platform height: Center of footplate
Toe angle: 0–15° outward
Muscle activation: Outer Quads/Vastus Lateralis 50%, Overall Quads 35%, Glutes 15%
Bringing your feet closer together shifts the emphasis toward the outer portion of your quadriceps and the vastus lateralis. This is a popular choice among bodybuilders who want to develop more visible definition through the front of their thighs. It requires your knees to travel more directly forward during the movement, increasing the load placed on the quad muscles.
While this position is excellent for quad development, it is worth noting that it demands more from your knee joints. Keep your toes pointing straight ahead or with only a very slight outward angle. Forcing your toes outward while your feet are close together creates a rotational stress on the knee that is best avoided. Keep the weight manageable and focus on controlled, deliberate reps.
6. Single-Leg Training: Fixing Imbalances
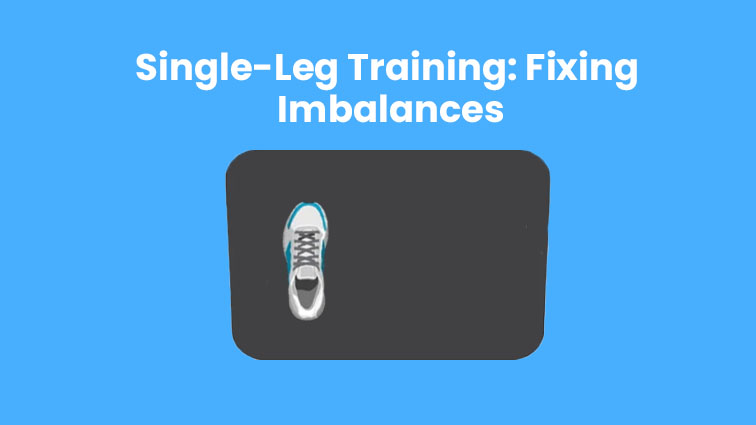
Foot position: Center of footplate, slightly toward the working side
Platform height: Center (50%)
Toe angle: 10–20° outward
Load: 40–50% of your usual bilateral weight
One of the most underused variations on the leg press is the single-leg version. By working one leg at a time, you remove the ability of your stronger side to compensate for the weaker one, which is something that happens naturally in bilateral training without you even noticing it. If you are working to correct a strength imbalance, single-leg pressing is one of the most direct ways to address it.
Position your working foot vertically in the center of the plate, slightly toward the side of the leg you are training, and keep the other foot off the platform entirely. This variation challenges your core stability more than standard pressing does. Start with roughly 40 to 50 percent of your usual bilateral load. The pistol squat is another unilateral movement with similar benefits, and the single-leg press makes a great complement to it by letting you build the same movement pattern under heavier loads.
7. Toes-Only Placement: Calf Development
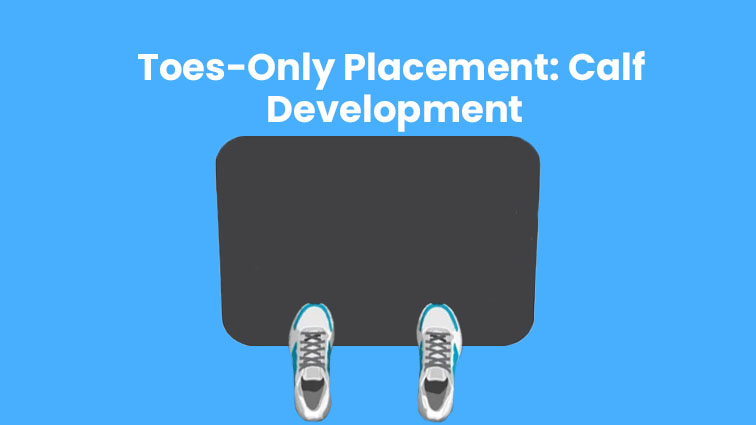
Foot position: Balls of feet on lower edge, heels hanging off
Platform height: Bottom 10–15% of footplate
Toe angle: Straight forward (0°)
Muscle activation: Gastrocnemius 60%, Soleus 40%
This is the most effective way to target your calves directly on the leg press. Place only the balls of your feet on the lower portion of the footplate with your heels hanging off the edge. Keep your legs fully extended (a slight bend is acceptable) and push through your toes as high as you can, hold briefly at the top, then lower with full control. This variation is far more effective for calf development than any other leg press position and makes a smart addition to leg days when you want to train calves without a separate machine.
Combining Foot Placements for Maximum Results
You can also double up on foot placement adjustments to target specific muscles even more aggressively:
Narrow + Low: the strongest combination for quad isolation. Increases both knee flexion depth and outer quad emphasis simultaneously. Best for bodybuilders targeting quad size and definition.
Wide + High: the most effective combination for the posterior chain. Maximizes both hip range of motion and adductor engagement, creating a powerful stimulus for the glutes and hamstrings together.
Avoid mixing opposite combinations such as narrow + high or wide + low, as these create conflicting demands that reduce the effectiveness of both adjustments.
Training by Goal: Sets, Reps, and Load
| Goal | Recommended Placement | Sets | Reps | Load |
| Maximum Strength | Standard or High | 3–5 | 3–6 | 85–95% 1RM |
| Muscle Growth (Hypertrophy) | Rotate all positions | 3–4 | 8–15 | 65–85% 1RM |
| Athletic Performance | Standard, Single Leg, High | 3–4 | 6–8 (explosive) | 70–80% 1RM |
| Rehab / Reduced Knee Stress | High + moderate width | 2–3 | 15–20 | 40–60% 1RM |
| Muscle Endurance | Vary weekly | 3–4 | 20–30 | 40–60% 1RM |
For hypertrophy, a useful weekly split looks like this:
- Monday: Standard + Wide
- Thursday: Low + Narrow
- Saturday: High + Single Leg
How to Add Variety to Your Leg Training
Rotating through different foot placements across your training sessions is one of the smartest ways to ensure complete lower body development. Rather than picking one position and sticking to it indefinitely, consider cycling through high, standard, and low placements over the course of a few weeks. This keeps the stimulus fresh, reduces the risk of overuse strain from always loading the same joints in the same way, and ensures that no muscle group gets neglected.
You can also combine variations within a single workout. Starting with a high-foot wide stance for posterior chain work, then finishing with a narrow low stance for a quad-focused burnout, gives you a thorough lower body session on one machine. Just adjust the weight accordingly since some positions allow more load than others.
Do not overlook tempo as a tool either. Slowing down the lowering phase to three or four seconds dramatically increases the time your muscles are under tension, which is a well-established driver of hypertrophy. You can apply this to any foot position and immediately make the set harder without adding a single pound of weight.
Common Mistakes to Avoid
Loading too much weight and shortening range of motion. Partial reps might feel impressive, but they rob you of the deep muscular stretch that drives growth. Use a weight that lets you move through a full, controlled range of motion.
Letting the hips and lower back peel off the seat. This usually means the weight is too heavy or the foot placement does not suit your hip flexibility. Your back must stay in contact with the pad through every rep. If it lifts, drop the weight or move your feet higher on the plate.
Snapping the knees into a fully locked position at the top. That shifts the load from your muscles onto the joint and can cause pain over time. Stop just short of lockout and keep the tension where it belongs.
Knees caving inward (valgus collapse). This is a common sign of weak glutes or an incorrect toe angle. Reduce the weight, focus on actively pushing your knees outward, and increase the external rotation of your toes slightly.
Heels lifting off the plate. Usually caused by placing feet too low without adequate ankle flexibility. Move your feet up slightly or work on ankle mobility before attempting very low placements.
Asymmetrical foot position. One foot higher or wider than the other leads to uneven loading and muscular imbalances over time. Use the platform lines as a guide and check your positioning before every set.
Pointing toes inward. Some lifters believe this targets the outer quads more, but there is currently little scientific evidence to support this, and it increases rotational stress on the knee. Stick straight ahead or slightly outward.
Final Thoughts
The leg press is one of the most rewarding machines in the gym once you stop treating it as a one-size-fits-all movement. Every shift in foot position tells your body a different story and sends a different growth signal to your muscles. Understanding those signals and using them with intention is what separates someone who gets results from someone who just goes through the motions.
Start with the standard placement to build confidence, then gradually explore the other positions based on your goals. Whether you are chasing bigger quads, rounder glutes, or stronger hamstrings, the tools are already available to you on that single machine. Use them well, stay consistent, and your legs will respond.