Some exercises test your strength. Others test your balance or flexibility. But very few test all of them at the same time. The Pistol Squat is one of those rare movements that demands everything from your body at once. It is a single-leg squat where you lower yourself completely to the ground on one leg while keeping the other leg extended straight out in front of you.
No support, no second foot to fall back on, just you, your strength, and your balance working together. It looks impressive, and honestly, it is. But what makes it truly special is not just how it looks. It is what it builds along the way. Whether you are a complete beginner or someone who has been training for years, this guide will walk you through exactly how to get there, one step at a time.
Why This Movement Is Worth Your Time
Before jumping into progressions, it helps to understand why this exercise deserves a place in your training routine. A lot of people focus only on bilateral movements, meaning exercises where both legs work at the same time, like regular squats, leg presses, or deadlifts. These are great movements and should absolutely be part of any solid program. But single-leg training fills a gap that two-legged exercises simply cannot.
When both legs are working together, the stronger side naturally picks up the slack for the weaker one. You may not even notice it happening. Single-leg training removes that compensation completely. Each leg has to do its own job, which quickly reveals any strength or mobility differences between your left and right sides. Fixing those imbalances does not just make you better at the pistol squat. It makes you more balanced, more resilient, and better at almost every other physical activity you do.
Understanding the benefits of pistol squat training goes beyond just building impressive lower-body strength. As Peloton Instructor Kirra Michel explains, “Single-leg squats improve balance, strength, flexibility, and stability, all of which assist in overall functional range of motion.
As we age, it is important to focus on these areas to help reduce the risk of injury.” It also trains your quads, glutes, hamstrings, calves, hip flexors, and core all at once. It improves ankle mobility, hip flexibility, and proprioception, which is your body’s ability to sense where it is in space. These are qualities that matter both in sport and in everyday life.
What You Need Before You Start
Honest Self-Assessment Comes First
One of the biggest mistakes people make is jumping into a pistol squat progression before their body is actually ready. Taking a moment to assess where you are right now will save you a lot of frustration later.
There are a few key areas to check. First, ankle mobility. Can you perform a deep two-legged squat with your heels flat on the floor and your torso fairly upright? If your heels come up or you fall backward, ankle dorsiflexion is likely limited and needs attention before progressing.
Second, single-leg balance. Try standing on one leg with the other extended forward and hold it for about fifteen seconds. If that feels very shaky, some basic balance work should come before single-leg squatting. Third, basic leg strength. A good benchmark is being able to perform ten controlled reverse lunges on each leg with just your bodyweight before moving forward.
Ankle Mobility Is the Most Common Limiting Factor
This point is worth its own mention because it is so often overlooked. Most people assume that not being strong enough is what holds them back. In reality, restricted ankle mobility is the most common roadblock. Dallas Reynolds, a physical therapist at ATI Physical Therapy, notes that pistol squats place significant demand on the knee joint through a deep range of motion, and ankle restrictions only compound that stress.
When the ankle cannot flex enough to keep the heel flat during a deep single-leg squat, the whole movement breaks down. Spending a few minutes daily on ankle dorsiflexion work, like wall ankle stretches or deep squat holds, can unlock progress faster than almost anything else.
When you are honest about your starting point and understand what the pistol squat muscles worked actually are, including the quads, glutes, hamstrings, hip flexors, calves, and core, you begin to see this exercise as a full-body investment rather than just a lower-body challenge.
Safety Considerations Before You Progress
This exercise is not suitable for everyone, and that is completely fine. Because the pistol squat creates significant stress on the knee joint, it can aggravate existing knee conditions or contribute to lower back strain if attempted without adequate preparation. If you currently deal with knee pain, patellofemoral issues, or a history of lower back problems, it is worth speaking with a physiotherapist or qualified trainer before working toward this movement.
Even for healthy individuals, progressing too quickly is one of the most common causes of setbacks. Start with a small range of motion and increase depth gradually as your strength and mobility improve. Never push through sharp joint pain. Muscle fatigue and mild discomfort during effort are normal. Pain in the knee, hip, or lower back is a signal to stop and reassess.
The 5-Step Progression Plan
Step 1: Build Your Foundation with the Bodyweight Squat
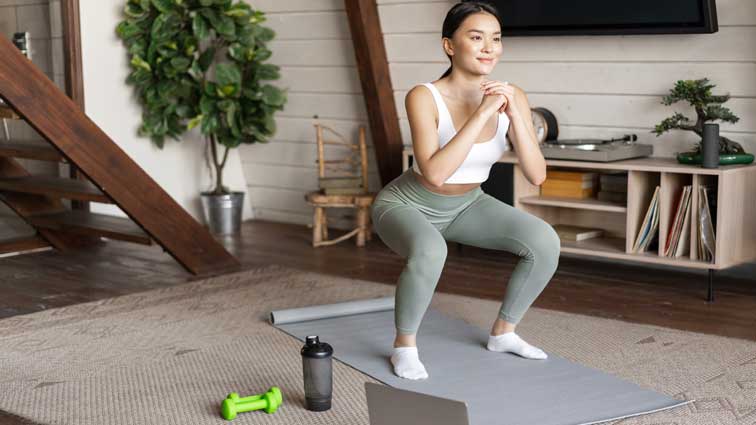
Every advanced movement has a foundation, and for this one, it starts with the basic two-legged bodyweight squat. Stand with your feet about shoulder-width apart, push your hips back, bend your knees, and lower yourself as far as you can while keeping your chest up and your back straight. Then push back up through your heels.
This might feel too simple, but it matters. You are training your body to move through a full range of motion, building the quad and glute strength that carries over into single-leg work, and developing the motor patterns you will rely on in every step that follows. Do not rush past this stage. A solid two-legged squat is the first honest test of whether your body is ready to handle greater demands on a single leg.
Step 2: Develop Single-Leg Strength with the Bulgarian Split Squat
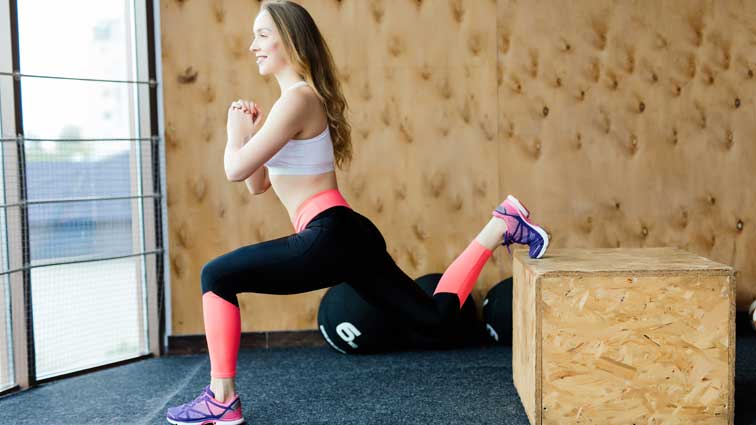
Once you are comfortable with the bodyweight squat, the Bulgarian split squat is your next step. Stand about a lunge-length in front of a bench. Place the top of one foot on the bench behind you, then bend your front knee and lower your body down toward the ground. Push back up through your front foot to return to the starting position.
This exercise targets the same muscle groups as the pistol squat but with more stability since both legs are still involved. It also begins to challenge your single-leg strength in a way that carries directly into the progressions ahead. If you have ever followed a structured training plan like the Arnold split, which cycles through different muscle groups across the week, incorporating Bulgarian split squats into your lower body days is a smart and targeted way to build the unilateral strength this movement demands.
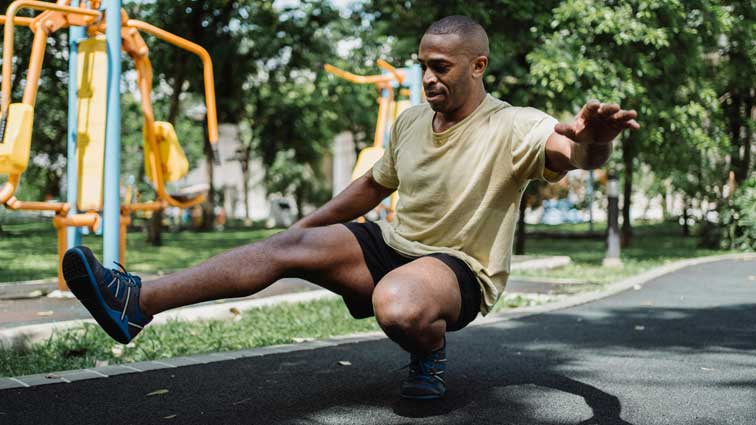
Step 3: Practice the Box Pistol Squat
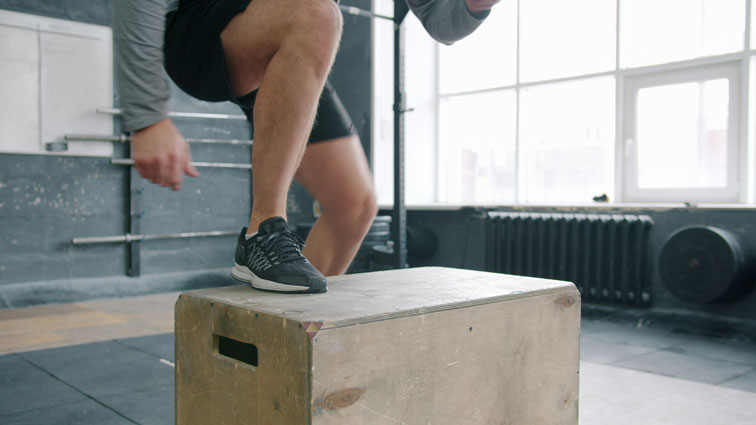
This is where single-leg training really begins. Stand in front of a sturdy box or chair. Shift your weight onto one leg, extend the other leg forward, and slowly lower yourself down to sit on the box. Then drive through your front foot to stand back up on that same single leg.
The key here is control. Lower yourself slowly and with intention rather than just dropping down. The box removes the need to complete the full range of motion right away, which makes the movement accessible while still building the strength and balance patterns you need. Start with a higher surface and gradually reduce the height over time as your confidence and control improve.
Think of this stage the way a coach might think about leg press foot placement, where small positional adjustments have a big impact on which muscles are being targeted. The height of your box and how deliberately you control the descent will shape how effectively this step prepares you for the next one.
Step 4: Use the Eccentric Method and the Assisted Variation
The eccentric method is one of the most underused tools in learning this movement. Stand on one leg, extend the other forward, and slowly lower yourself down over three to five seconds. At the bottom, place both feet on the ground and use both legs to stand back up.
This approach isolates the hardest part of the descent and builds strength through the full range of motion without requiring you to drive back up unilaterally yet. Over time, the slow lowering builds serious quad and glute strength, and your body starts to develop the stability and motor control needed to eventually push back up on its own.
Once the eccentric feels manageable, introducing the assisted pistol squat is a natural next step. Hold a TRX strap, a resistance band anchored to a fixed point, or a sturdy upright with one hand to reduce the balance and strength demand while continuing to practice the full movement pattern. The goal is to use as little assistance as possible and gradually rely on it less with each session.
You can also pair this stage with accessory core work to support the stability demands of single-leg training. Exercises like side crunches help reinforce lateral core strength, which plays a quiet but important role in keeping your torso upright and controlled during the descent.
Step 5: Refine Your Form and Progress to the Full Movement
The final progression before the full movement is the elevated pistol squat. Stand on a low box or step so that your non-working leg can dip slightly below the surface level as you descend. This makes it easier to keep the extended leg from touching the ground and builds the full range of motion control you need for the floor version.
Paying close attention to pistol squat form at this stage makes a real difference. Keep your arms extended forward for counterbalance, your heel flat on the surface, your chest as upright as possible, and your descent slow and deliberate. Rushing through this step or ignoring small technique details will make the floor version harder than it needs to be.
Once the elevated version feels steady and consistent, take it to the floor. The single leg pistol squat on a flat surface is the truest test of everything you have built through these progressions. Expect the first few attempts to feel unsteady. That is completely normal. Stay patient, keep your focus on control rather than speed, and trust that the strength and balance you have built will carry you through.
Common Mistakes to Avoid
Letting the Heel Rise Off the Ground
This is the most frequent technical error and it almost always points to restricted ankle mobility rather than a strength problem. When the heel lifts during the descent, it shifts the load forward onto the knee in a way that reduces control and increases injury risk. If this keeps happening, step back and prioritize ankle dorsiflexion work before pushing deeper into the movement.
Allowing the Knee to Cave Inward
Knee cave during the descent or the drive back up typically signals that the gluteus medius is not activating properly. This muscle is responsible for keeping the pelvis stable and the knee tracking in line with the foot. Supplementary exercises like banded clamshells, lateral band walks, and single-leg glute bridges are all effective at building this strength and correcting the pattern over time.
Excessive Forward Lean and Rounding of the Lower Back
A slight forward lean is natural in this movement and nothing to be concerned about. However, significant rounding of the lower back during the descent is worth addressing. This usually points to limited hip flexor mobility or thoracic stiffness. Working on hip flexor stretching and upper back mobility alongside your pistol squat practice will help you maintain a more upright and controlled position as you go deeper.
The Mindset That Makes the Difference
Progress Is the Goal, Not Perfection
One thing that separates people who eventually master this movement from those who give up is how they think about the process. This is not a movement you learn in a week. For most people, getting a clean first rep takes several months of consistent, focused work. That is completely normal and should not discourage you.
Every step in the progression above builds something real. Strength, balance, mobility, and body awareness all develop gradually, and each session adds to that foundation whether you feel like you are making progress or not. The key is to stay consistent, be honest about where you are in the process, and resist the urge to skip ahead before each stage feels truly solid. Celebrate the small wins. A lower box, a cleaner descent, a steadier balance hold, these all count as real progress.
Conclusion
The pistol squat is one of the most complete lower-body exercises you can work toward. It builds unilateral strength, improves mobility across the ankle, knee, and hip, develops balance and coordination, and requires nothing but your own bodyweight. The five progressions outlined in this guide, from the basic bodyweight squat all the way to the full single-leg movement, give you a clear and reliable path to follow. Trust the process, work through each step with patience and intention, and the results will follow.